September 1st, 2010 • Comments Off on Tinkering with Illumos
Honestly I do not really get the point why everybody is so upset about what happened to OpenSolaris. I can understand the steps Oracle took – and do not forget: The source is still under a CDDL license. A bit sad that the community doesn’t get real-time updates anymore.
On the other side I think that the initial idea of the Illumos project to replace the last closed source bits in ON is a good one. But I’m also looking forward to the Solaris 11 Express edition – I know some Solaris developers over at Sun/Oracle and those guys do a great job!
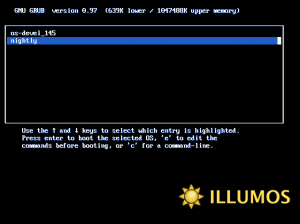
Here is a nice screen shot of Illumos booting BTW:

Categories: Personal, Work • Tags: OpenSolaris • Permalink for this article
August 1st, 2010 • 4 Comments
Now assume you have written an RESTful python application which you want to deploy in a secure manner. Many environments use a PKI security setup using X509 certificates. The good news is that you can do this. Install apache and the mod_wsgi module. On an Ubuntu Server a apt-get install libapache2-mod-wsgi apache2 will do.
Now simply add a site to your apache2 configuration – Normally located in /etc/apache2/sites-available:
WSGIPythonPath <python path>

    Listen 81
    NameVirtualHost *:81
    <VirtualHost *:81>
        ServerAdmin root@localhost
        ServerName localhost

        SSLEngine on
        SSLCertificateFile <path to cert>/newcert.pem
        SSLCertificateKeyFile<path to cert>/newkey.pem
        SSLCACertificateFile <path to cert>/cacert.pem
        SSLVerifyClient require
        SSLVerifyDepth 2

        SSLOptions +StdEnvVars

        WSGIScriptAlias / /<path to your service>/service.py

        ErrorLog /var/log/apache2/service.error.log
        CustomLog /var/log/apache2/service.log common
    </VirtualHost>
That’s it! The python app is now available on localhost:81 – Apache will ensure that the client certificate is authenticated against the CA! The statement SSLOptions +StdEnvVars ensures that the according headers are forwared to your python application so you also verify the user by his DN defined in the certificate.
Categories: Work • Tags: OCCI, Python • Permalink for this article
July 14th, 2010 • 1 Comment
I’m a fan of software development processes. They need to be simple and easy to follow. Now one thing I like are so called task/story boards for agile development to keep track of stuff in the pipeline. What I do not like is that tool support is rather not good. Most people seem to be using ‘real’ task/story boards with paper and pen. That is not an option for me – since I’m not always in the same place 🙂
Other tools are so overblown that they are hardly usable – and again an external tool makes that the stories and their states are not stored near the source code – where the belong IMHO.
So I stumbled upon simple-kanban an easy tool where you basically can just drag and drop stories around based on their state. There is a very simple editor for editing the stories and the best feature is: It’s an single HTML file which you can check-in next to your source code in your SCM. And with the web browser integrated in eclipse even open in your IDE.
Only feature missing was that this board couldn’t store the information – you had to manually copy the stories from the editor and paste them into the HTML file, which you could save then:
Go to the data view and copy all stories. Then simply edit the source of the HTML file with an editor of your choice, preferably one which knows HTML. There you can paste the copied stories over the old ones and save the HTML file.
I didn’t like that – and since I knew of tiddlywiki, which is another single page application (SPA), which can store data, I thought I can update it. So I took the saving features from the wiki (described here BTW) and integrated them with the simple-kanban board. Now I have a save button and do not need to do nasty copy & pastes into source codes.
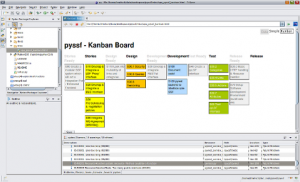
BTW this is how it looks in Eclipse:

Nice for small projects, your to-dos (Getting Thinks Done (GTD)) or any other stuff…
Categories: Work • Tags: Software Engineering • Permalink for this article
June 11th, 2010 • Comments Off on Running BES++ with Platform LSF
Prerequisite is an installed LSF cluster and a gsoap 2.7.10 installation (make sure that it is exact this version – newer version won’t work). Now check-out the BES++ sources:
svn co https://bespp.svn.sourceforge.net/svnroot/bespp bespp
Now edit the Make.config file and adjust the path to your gsoap installation. The attribute is called GSOAP_TOP and can be found in the first lines of the file. You might need to adjust the LSF_LOC and LSF_ARCH attribute as well – based on the system you use. Now simple run make and the two executable besclient and besserver will be created.
While you might up ending using SSL you need to create a simple CA (or go to http://cacert.org):
mkdir cert
/usr/lib/ssl/misc/CA.pl -newca # will initialize the CA
[...]
/usr/lib/ssl/misc/CA.pl -newreq # will create a cert request
/usr/lib/ssl/misc/CA.pl -sign # sign the request
cat newcert.pem newkey.pem > server.pem# create server pem
mkdir server/ && mv new* server/ # cleanup a bit
ln -s server.pem `openssl x509 -noout -hash -in server.pem`.0
./besserver -u <username> -h localhost -p 8443 -s <path>/cert/server.pem -c <path>/cert/ -g <username> -r lsf # run the besserver
Now to submit a simple job/activity with the besclient:
/usr/lib/ssl/misc/CA.pl -newreq # will create a cert request
/usr/lib/ssl/misc/CA.pl -sign # sign the request
cat newcert.pem newkey.pem > user.pem
mkdir user1 && mv new* user1/
besclient -x user.pem -e endpoint.xml create sleep.jsdl # runs the client
The enpoint.xml files looks like:
<?xml version="1.0"  encoding="UTF-8"?>
<wsa:EndpointReference xmlns:wsa="http://www.w3.org/2005/08/addressing">
    <wsa:Address>https://localhost:8443</wsa:Address>
</wsa:EndpointReference>
The sample sleep.jsdl file looks like:
<?xml version="1.0" encoding="UTF-8"?>
<JobDefinition xmlns="http://schemas.ggf.org/jsdl/2005/11/jsdl">
    <JobDescription>
        <JobIdentification>
            <JobName>Sleep</JobName>
        </JobIdentification>
        <Application>
            <HPCProfileApplication xmlns="http://schemas.ggf.org/jsdl/2006/07/jsdl-hpcpa">
                <Executable>sleep</Executable>
                <Argument>60</Argument>
                <Output>/dev/null</Output>
                <WorkingDirectory>/tmp</WorkingDirectory>
            </HPCProfileApplication>
        </Application>
        <Resources>
            <TotalCPUCount>
                <Exact>1</Exact>
            </TotalCPUCount>
        </Resources>
    </JobDescription>
</JobDefinition>
Note: it might be necessary to add your CA to the /usr/lib/ssl/ directory as symbolic link…
Categories: Personal, Work • Tags: LSF • Permalink for this article
June 7th, 2010 • Comments Off on Install and Autoconfigure a Opensolaris zone with ZFS dedup
This is a simple script which will setup a OpenSolaris zone. After installing it is automatically configured using the sysidcfg file After running this script you will be logged in automatically. I use this script (slightly modified) to setup a complete test Platform LSF cluster…
It features the following setup:
- Support for ZFS deduplication so you can clone this machine and save disk space
- Support for DHCP so you can properly configure your network on your router
- Creates initial root password (You could add NIS or similar support as well)
#!/usr/bin/bash
zfs create rpool/export/zones
zfs set mountpoint=/zones rpool/export/zones
zfs set dedup=on rpool/export/zones

mkdir /zones/lsf_zone
chmod 700 /zones/lsf_zone

zonecfg -z lsf_zone "create; set zonepath=/zones/lsf_zone; set autoboot=false; add net; set address=192.168.0.160/24
; set defrouter=192.168.0.1; set physical=iwh0; end; verify; commit"

zoneadm -z lsf_zone verify
zoneadm -z lsf_zone install

zoneadm -z lsf_zone ready
touch /zones/lsf_zone/root/etc/sysidcfg

echo "name_service=NONE
system_locale=C
timeserver=localhost
timezone=CET
terminal=xterm
security_policy=NONE
nfs4_domain=dynamic
network_interface=primary {dhcp protocol_ipv6=no}" &> /zones/lsf_zone/root/etc/sysidcfg

zoneadm -z lsf_zone boot
Categories: Work • Tags: LSF, OpenSolaris, ZFS • Permalink for this article
Page 4 of 17« First«...23456...10...»Last »

